Lighting maps
Lighting/Lighting-maps
In the previous chapter we discussed the possibility of each object having a unique material of its own that reacts differently to light. This is great for giving each object a unique look in comparison to other objects, but still doesn't offer much flexibility on the visual output of an object.
In the previous chapter we defined a material for an entire object as a whole. Objects in the real world however usually do not consist of a single material, but of several materials. Think of a car: its exterior consists of a shiny fabric, it has windows that partly reflect the surrounding environment, its tires are all but shiny so they don't have specular highlights and it has rims that are super shiny (if you actually washed your car alright). The car also has diffuse and ambient colors that are not the same for the entire object; a car displays many different ambient/diffuse colors. All by all, such an object has different material properties for each of its different parts.
So the material system in the previous chapter isn't sufficient for all but the simplest models so we need to extend the system by introducing diffuse and specular maps. These allow us to influence the diffuse (and indirectly the ambient component since they should be the same anyways) and the specular component of an object with much more precision.
Diffuse maps
What we want is some way to set the diffuse colors of an object for each individual fragment. Some sort of system where we can retrieve a color value based on the fragment's position on the object?
This should probably all sound familiar and we've been using such a system for a while now. This sounds just like textures we've extensively discussed in one of the earlier chapters and it basically is just that: a texture. We're just using a different name for the same underlying principle: using an image wrapped around an object that we can index for unique color values per fragment. In lit scenes this is usually called a
To demonstrate diffuse maps we're going to use the following image of a wooden container with a steel border:
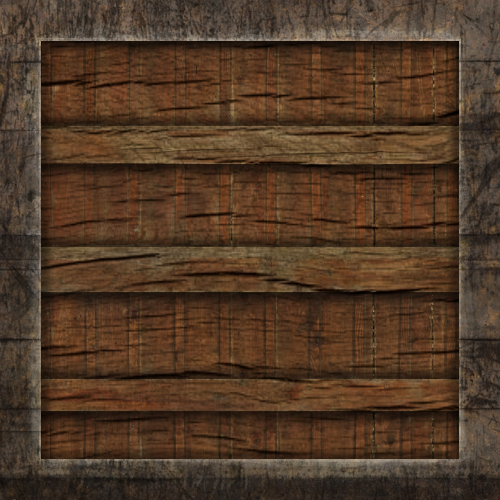
Using a diffuse map in shaders is exactly like we showed in the texture chapter. This time however we store the texture as a sampler2D inside the vec3 diffuse color vector with the diffuse map.
sampler2D is a so called We also remove the ambient material color vector since the ambient color is equal to the diffuse color anyways now that we control ambient with the light. So there's no need to store it separately:
struct Material {
    sampler2D diffuse;
    vec3      specular;
    float     shininess;
};
...
in vec2 TexCoords;
vec3, but then the ambient colors would still remain the same for the entire object. To get different ambient values for each fragment you'd have to use another texture for ambient values alone.
Note that we are going to need texture coordinates again in the fragment shader, so we declared an extra input variable. Then we simply sample from the texture to retrieve the fragment's diffuse color value:
vec3 diffuse = light.diffuse * diff * vec3(texture(material.diffuse, TexCoords));
Also, don't forget to set the ambient material's color equal to the diffuse material's color as well:
vec3 ambient = light.ambient * vec3(texture(material.diffuse, TexCoords));
And that's all it takes to use a diffuse map. As you can see it is nothing new, but it does provide a dramatic increase in visual quality. To get it working we do need to update the vertex data with texture coordinates, transfer them as vertex attributes to the fragment shader, load the texture, and bind the texture to the appropriate texture unit.
The updated vertex data can be found here. The vertex data now includes vertex positions, normal vectors, and texture coordinates for each of the cube's vertices. Let's update the vertex shader to accept texture coordinates as a vertex attribute and forward them to the fragment shader:
#version 330 core
layout (location = 0) in vec3 aPos;
layout (location = 1) in vec3 aNormal;
layout (location = 2) in vec2 aTexCoords;
...
out vec2 TexCoords;

void main()
{
    ...
    TexCoords = aTexCoords;
}
Be sure to update the vertex attribute pointers of both VAOs to match the new vertex data and load the container image as a texture. Before rendering the cube we want to assign the right texture unit to the material.diffuse uniform sampler and bind the container texture to this texture unit:
lightingShader.setInt("material.diffuse", 0);
...
glActiveTexture (GL_TEXTURE0);
glBindTexture (GL_TEXTURE_2D, diffuseMap);
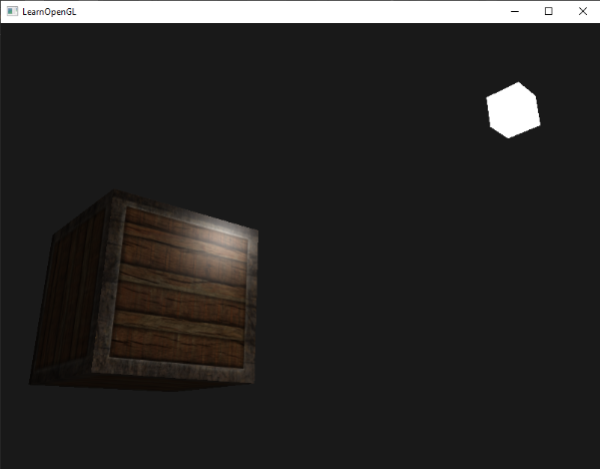
Now using a diffuse map we get an enormous boost in detail again and this time the container really starts to shine (quite literally). Your container now probably looks something like this:
You can find the full source code of the application here.
Specular maps
You probably noticed that the specular highlight looks a bit odd since the object is a container that mostly consists of wood and wood doesn't have specular highlights like that. We can fix this by setting the specular material of the object to vec3(0.0) but that would mean that the steel borders of the container would stop showing specular highlights as well and steel should show specular highlights. We would like to control what parts of the object should show a specular highlight with varying intensity. This is a problem that sounds familiar. Coincidence? I think not.
We can also use a texture map just for specular highlights. This means we need to generate a black and white (or colors if you feel like it) texture that defines the specular intensities of each part of the object. An example of a specular map is the following image:
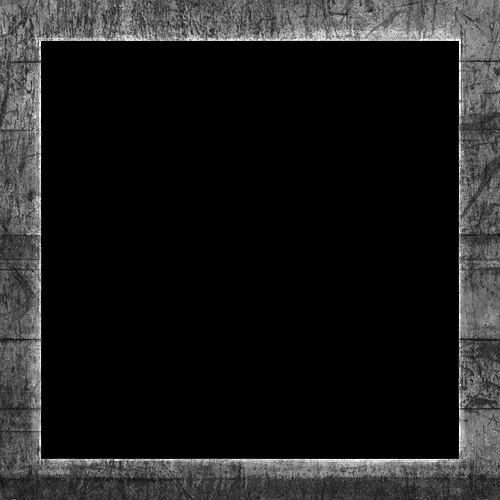
The intensity of the specular highlight comes from the brightness of each pixel in the image. Each pixel of the specular map can be displayed as a color vector where black represents the color vector vec3(0.0) and gray the color vector vec3(0.5) for example. In the fragment shader we then sample the corresponding color value and multiply this value with the light's specular intensity. The more 'white' a pixel is, the higher the result of the multiplication and thus the brighter the specular component of an object becomes.
Because the container mostly consists of wood, and wood as a material should have no specular highlights, the entire wooden section of the diffuse texture was converted to black: black sections do not have any specular highlight. The steel border of the container has varying specular intensities with the steel itself being relatively susceptible to specular highlights while the cracks are not.
Using tools like Photoshop or Gimp it is relatively easy to transform a diffuse texture to a specular image like this by cutting out some parts, transforming it to black and white and increasing the brightness/contrast.
Sampling specular maps
A specular map is just like any other texture so the code is similar to the diffuse map code. Make sure to properly load the image and generate a texture object. Since we're using another texture sampler in the same fragment shader we have to use a different texture unit (see Textures) for the specular map so let's bind it to the appropriate texture unit before rendering:
lightingShader.setInt("material.specular", 1);
...
glActiveTexture (GL_TEXTURE1);
glBindTexture (GL_TEXTURE_2D, specularMap);
Then update the material properties of the fragment shader to accept a sampler2D as its specular component instead of a vec3:
struct Material {
    sampler2D diffuse;
    sampler2D specular;
    float     shininess;
};
And lastly we want to sample the specular map to retrieve the fragment's corresponding specular intensity:
vec3 ambient  = light.ambient  * vec3(texture(material.diffuse, TexCoords));
vec3 diffuse  = light.diffuse  * diff * vec3(texture(material.diffuse, TexCoords));
vec3 specular = light.specular * spec * vec3(texture(material.specular, TexCoords));
FragColor = vec4(ambient + diffuse + specular, 1.0);
By using a specular map we can specify with enormous detail what parts of an object have shiny properties and we can even control the corresponding intensity. Specular maps give us an added layer of control over lighting on top of the diffuse map.
If you would now run the application you can clearly see that the container's material now closely resembles that of an actual wooden container with steel frames:
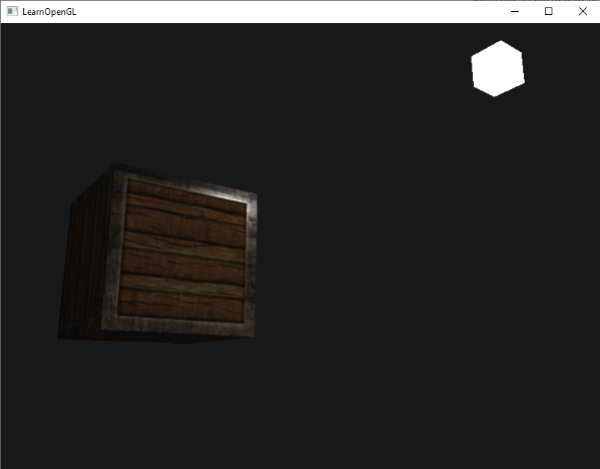
You can find the full source code of the application here.
Using diffuse and specular maps we can really add an enormous amount of detail into relatively simple objects. We can even add more detail into the objects using other texture maps like
Exercises
- Fool around with the light source's ambient, diffuse and specular vectors and see how they affect the visual output of the container.
- Try inverting the color values of the specular map in the fragment shader so that the wood shows specular highlights and the steel borders do not (note that due to the cracks in the steel border the borders still show some specular highlight, although with less intensity): solution.
- Try creating a specular map from the diffuse texture that uses actual colors instead of black and white and see that the result doesn't look too realistic. You can use this colored specular map if you can't generate one yourself: result.
-
Also add something they call an
emission map which is a texture that stores emission values per fragment. Emission values are colors an object may emit as if it contains a light source itself; this way an object can glow regardless of the light conditions. Emission maps are often what you see when objects in a game glow (like eyes of a robot, or light strips on a container). Add the following texture (by creativesam) as an emission map onto the container as if the letters emit light: solution; result.


